-
Most Popular
Learning to make sprites
I was looking through the contents of the cassette that came with the ... Read More!Amstrad 3.5" Floppy drive - DSK to Disc
So you've got the floppy drive all powered and plugged in, but got no Amstrad CPC software on 3.5" d... Read More!Connecting a 3.5" floppy drive to an Amstrad 464 without modifying the drive or DDI-1
Quite some time ago I bought a DDI-1 interface to use with my amstrad 464's. Just the interface with... Read More!Yet more Amstrads added to the collection - ALT-386sx and PCW8256
If you haven't guessed already, I like my Amstrad computers. Purely because of nostalgia and curiosi... Read More!Schneider (Amstrad) CPC 664 surprise
As a collector of Amstrad machines, the holy grail to me is the Amstrad CPC 664. Only manufactured f... Read More!
3D printingCreated on: 13-03-2019 By Gee |
Oh it's been a busy few weeks with work and home life. Not really had much time to update anything on here until now.
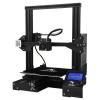
As you can see from the topic title, this topic is about 3D printing! I have been thinking about how I was going to make the controller cases for a while and thought about all sorts of ways. The easiest way was, of course, to just get a 3d printer and print them. At least that'll mean I can finish the prototypes for feedback on the next models! So a while back I ordered a cheap 3d printer with an ok bed size (220x220x250). It arrived shortly after. I set about building it then trying to work out why I was getting cable snag in a couple of places. After I had the thing built I thought I should re-do the instructions that it came with to make it a little better understandable...and have some bits in a different order to make it flow a bit easier when you're building it. The printer in question is the Ender-3. Nothing special. A very entry level 3d printer, but it should do me just fine for what I need it for just now. It came with an SD card loaded with software and some gcode of a 'Test dog'. I loaded in the little amount of free filament and set the machine going with the test dog. It soon became apparent that the free filament wasn't going to be enough to even get a quarter of the dog printed. So I turned the machine off and a few days later I finally ordered a 1kg box of grey filament. It arrived today and I had it loaded as soon as I got home almost. I set the test dog off again...and it's still printing beside me as I type this. So far it's been going for 3 1/2 hours and we're finally getting the dogs head! I'm hoping to draw up some controller cases and have them printed soon, along with some buttons. Keep you're eyes peeled, Hopefully you shall be seeing a complete controller soon. |
|
|
