-
Most Popular
Learning to make sprites
I was looking through the contents of the cassette that came with the ... Read More!Amstrad 3.5" Floppy drive - DSK to Disc
So you've got the floppy drive all powered and plugged in, but got no Amstrad CPC software on 3.5" d... Read More!Connecting a 3.5" floppy drive to an Amstrad 464 without modifying the drive or DDI-1
Quite some time ago I bought a DDI-1 interface to use with my amstrad 464's. Just the interface with... Read More!Yet more Amstrads added to the collection - ALT-386sx and PCW8256
If you haven't guessed already, I like my Amstrad computers. Purely because of nostalgia and curiosi... Read More!Schneider (Amstrad) CPC 664 surprise
As a collector of Amstrad machines, the holy grail to me is the Amstrad CPC 664. Only manufactured f... Read More!
Amstrad 3.5" Floppy drive - DSK to DiscCreated on: 21-06-2019 By Gee |
|
So you've got the floppy drive all powered and plugged in, but got no Amstrad CPC software on 3.5" discs yet?
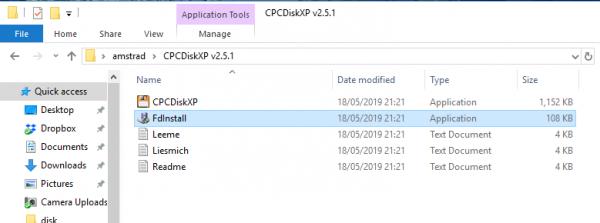
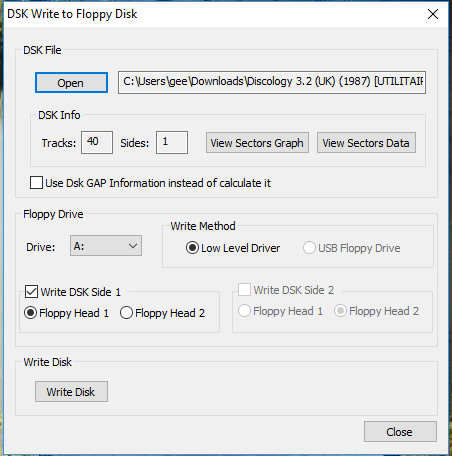
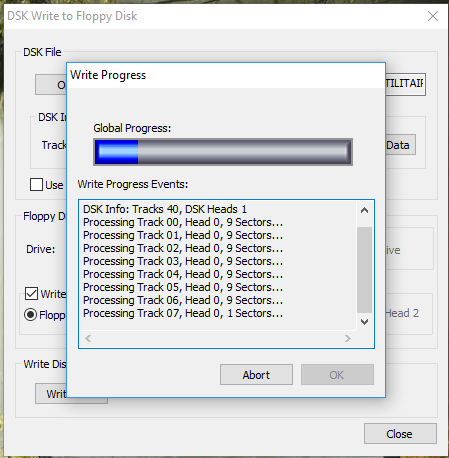
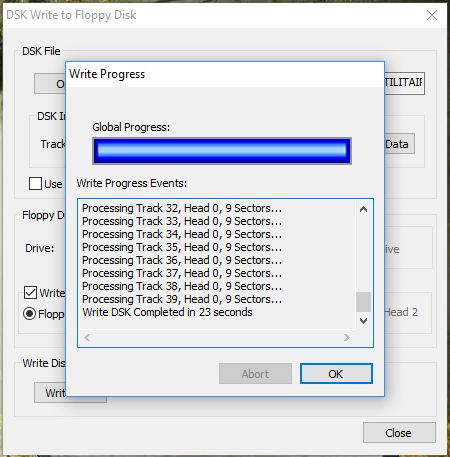
The first thing I done was to cover the high density hole on the floppy's I had then format them to data discs (using CP/M to format on drive B) then I downloaded discology and copied my 3" disc of CP/M to a 3.5" disc. That done three things for me; Confirmed that the software I was using on my pc worked, the 3.5" floppy drive worked as it should and that I now have a backup of my rather old CP/M disc. So how do you go about this I hear you ask. Well, If you read the first part of attaching a 3.5" drive to your Amstrad CPC 6128 then you'll know that I bought two drives for this project. I'm also lucky enough that the PC I built back in 2007/8 is still my main computer. Because of it's age, I can still plug a floppy drive into my PC internally (although I hear that might not be an issue any more if you use a USB floppy drive). One of my two drives wasn't modified at all and it was plugged straight in to the PC as it would have normally been. The next step of was to download CPCDiskXP and extract the zip file containing the readme files, a FdInstall.exe and the CPCDiskXP.exe program itself. Once I unzipped the archive, I used the Fdinstall.exe to install a driver on my windows 10 partition (yes it works in windows 10!) and then I could run the CPCDiskXP.exe. The CPCDiskXP software couldn't be easier. There's everything you need and nothing you don't, even a few nice to haves too. I put a CPC formatted 3.5" disc into my PC's floppy drive and then using the DSK to Disk button, I opened a .dsk file, made sure it had drive A selected and then just clicked Write. The software shows a nice animation of the disc being written to and confirms the disc has been written successfully. To check the Disc, all I done was power up my 6128 and it's "new" B drive, put the disc I just wrote on the pc into the drive and then typed |B and then after it showed READY I used the usual CAT command to see the contents of the new disc.I checked the software ran from the disc in the usual way you would and was satisfied that my 3.5" disc drive was working exactly as it should, the software to write to the discs on the PC also worked. The CPCDiskXP software has other functions too. It can do the reverse to what I am doing here and make an image file of your physical floppy discs and it can also format your floppies in specific Amstrad formats (also spectrum I believe). Some great software! A lot of people might be wondering why in 2019 I'm even doing this, when floppy emulators exist and they're much easier to use. The answer is simply because I find it fun and I like to challenge myself to use what would have been available in the time these computers were in use. On a side note. I have noticed that my Windows OS will not let me format a floppy disc using the usual methods for windows. Which is a bit odd. Not sure if the driver that I installed has stopped that from being able to work as a normal floppy drive. BUT I don't really need a floppy drive for normal PC activities anyway. So it's a price I'm willing to pay if it is. You might think this is the end of the series of making a 3.5" drive work with your Amstrad CPC 6128, but I have a couple more things I'm working on. The first being a longer ribbon cable so that I can place the drive a bit better round the Amstrad. The other thing I'm doing is 3d printing an enclosure for the drive, so that it's not just sitting around bare. It needs to look good as well as function. I've based the drive enclosure on the FD-1 drive, It's not perfect, but it'll do for what I'm after. |
|
|