-
Most Popular
Learning to make sprites
I was looking through the contents of the cassette that came with the ... Read More!Amstrad 3.5" Floppy drive - DSK to Disc
So you've got the floppy drive all powered and plugged in, but got no Amstrad CPC software on 3.5" d... Read More!Connecting a 3.5" floppy drive to an Amstrad 464 without modifying the drive or DDI-1
Quite some time ago I bought a DDI-1 interface to use with my amstrad 464's. Just the interface with... Read More!Yet more Amstrads added to the collection - ALT-386sx and PCW8256
If you haven't guessed already, I like my Amstrad computers. Purely because of nostalgia and curiosi... Read More!Schneider (Amstrad) CPC 664 surprise
As a collector of Amstrad machines, the holy grail to me is the Amstrad CPC 664. Only manufactured f... Read More!
First complete ControllerCreated on: 08-04-2019 By Gee |
|
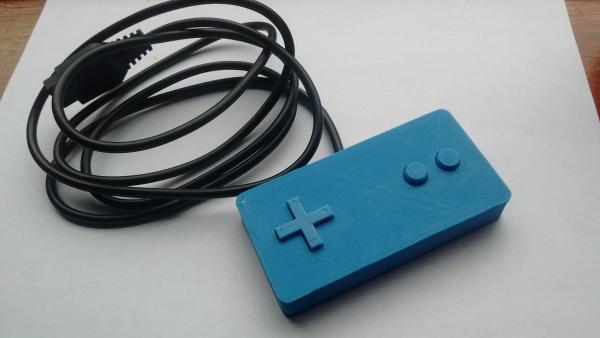
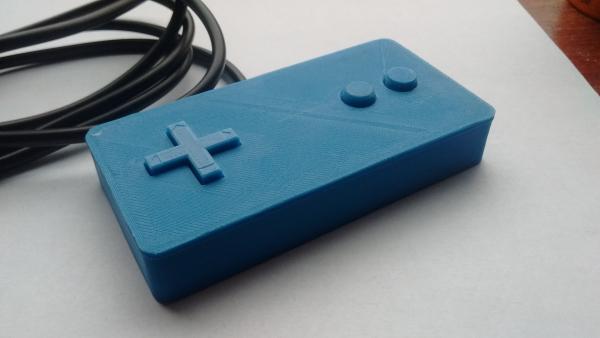
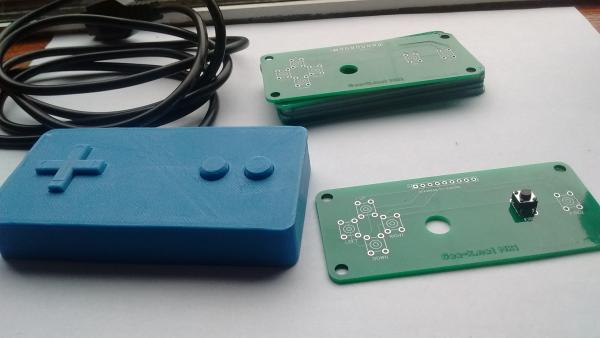
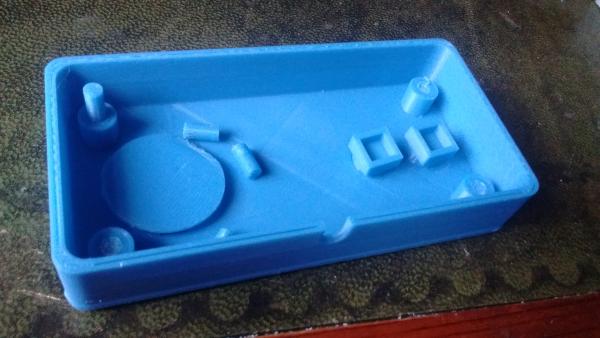
I've not had as much time as i'd like to play about with making this controller, but I finally managed to squeeze in getting the case made. I made the buttons a bit bigger so that it feels a bit more comfortable and a bit more natural. They're now 10mm instead of 8. I'm not sure why I went with 8mm to begin with. There must've been some reason for it.
After posting in a facebook group asking for thoughts on the original case, I had a comment that I should think about changing the colour of the buttons. Maybe one green and one blue. I agreed that the grey for everything was a bit dull and I ordered some blue fillament for the printer. When the filament arrived I changed it over from the grey and set about printing my controller case again but with the modified button holes and buttons. The first print came out horrible and had wavely lines all over the place. So that was scrap. I checked the bed height of the printer and re-leveled it just in case. Things started to look much better after that. Once the prints came out however, I soon realised that they were ever so slighlty over sized. The holes for the buttons were a tiny fraction too small and the buttons, too large. The filament must print differently to the grey that I had used before. I spoke briefly with a friend who has way more experience with 3d printing than I, and he confirmed my suspicions. He has a few settings for different filaments (of the same type e.g. PLA). So! I went into my CAD drawings and changed the sizes of a few parts here and there, then printed them again. They came out much better, so I set about putting the controller together. Now the base wasn't going on properly to the top and it broke when I tried to remove it. Naturally It was the part that took the longest to print that broke. I wasted no time in setting up another print and then I checked the hole sizes of where the two parts join together to see if that's what cause the problem. They were slightly off, so I drilled the holes that were supposed to be 4mm out with a 4mm drill bit. Once the replacement part had printed, I put it all together and it now looks great. I used Blue for the whole lot and I'm quite pleased with how it looks. Although it is still a lot of the one colour. Maybe i'll do some stickers to go over the top of them... |
|
|