-
Most Popular
Learning to make sprites
I was looking through the contents of the cassette that came with the ... Read More!Amstrad 3.5" Floppy drive - DSK to Disc
So you've got the floppy drive all powered and plugged in, but got no Amstrad CPC software on 3.5" d... Read More!Connecting a 3.5" floppy drive to an Amstrad 464 without modifying the drive or DDI-1
Quite some time ago I bought a DDI-1 interface to use with my amstrad 464's. Just the interface with... Read More!Yet more Amstrads added to the collection - ALT-386sx and PCW8256
If you haven't guessed already, I like my Amstrad computers. Purely because of nostalgia and curiosi... Read More!Schneider (Amstrad) CPC 664 surprise
As a collector of Amstrad machines, the holy grail to me is the Amstrad CPC 664. Only manufactured f... Read More!
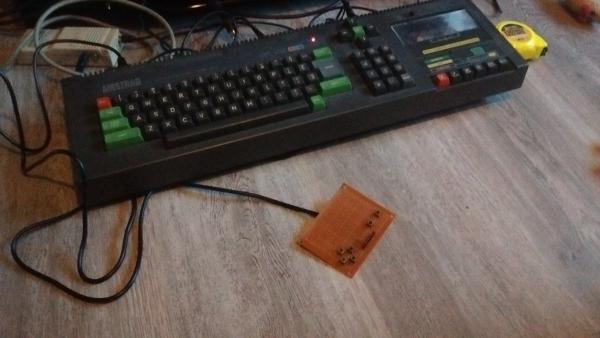
Controller prototype mk1 internals finishedCreated on: 26-01-2019 By Gee |
|
My Megadrive extension cable arrived in the post yesterday, so today I set about wiring up the last bits of the prototype controller.
I'm new to soldering, so there was a few screw ups on the way. I had to remove the original header pins that I soldered on as I had removed the plastic that holds them together and in place. I then had to re-solder them and the pins moved a lot as nothing was holding them there except the solder that I was now re-flowing. I thought that the best idea would be to remove them and put a new one on. I had to place it in new holes as I removed some copper pads accidentally. After the new header pins were on, I soldered in all the wires to the buttons with purple wire as I only have black, red and purple at the moment. It doesn't make any difference to me as it's really easy to follow each individual wire anyway. I then set about making the cable that connects to the joystick port of the Amstrad. It felt a bit of a shame to just cut one end of the new cable, but that's what I bought it for! I kept a little bit of cable sticking out of the part I cut off, just in case I want to make a joystick port splitter in the future. Two player madness! I had no idea what colour of wire related to what pin of the 9 pin plug, So I got a bit of wire, put it in the hole for pin one, put the other end of the wire into a breadboard where I am making the Ben Eater computer and then touched each coloured wire onto the live cable to complete the circuit to my LED. When the light came on, I knew I had the wire connected to the pin. I done this for each of the 9 pins until I had noted each one. If anyone gets one of these cheap Megadrive cables on eBay, the wires are as follows:
I got all of these wire soldered onto the relevant place on the header and made sure the cable was attached in a way that it wouldn't just rip out when I was moving about with it. Et Voila! I plugged the controller into the Amstrad and pressed the buttons. All the relevant related characters came up on screen and when I put 1943 in and loaded it up, I played away with no hassle what so ever. I managed some pretty good scores for my 2nd time playing it. I'm sure I could do better though! Now I have the inners to a prototype, I Will see about making a case for it. I'll need to get a 3d printer to get some cases made. I already have one in mind. Stay tuned to see what happens next! |
|
|